Create and Store Accounts using MetaMask
To create an account on the network you can use MetaMask, a Chrome extension that provides an “identity vault” and connection to an Ethereum network, public, test or custom. MetaMask formulates a transaction to register the account in the network. This transaction, like any other transaction, will go to one of the transaction nodes, and eventually be mined into a block.
Install MetaMask and connect to the Ethereum network
To install the extension Open Chrome and
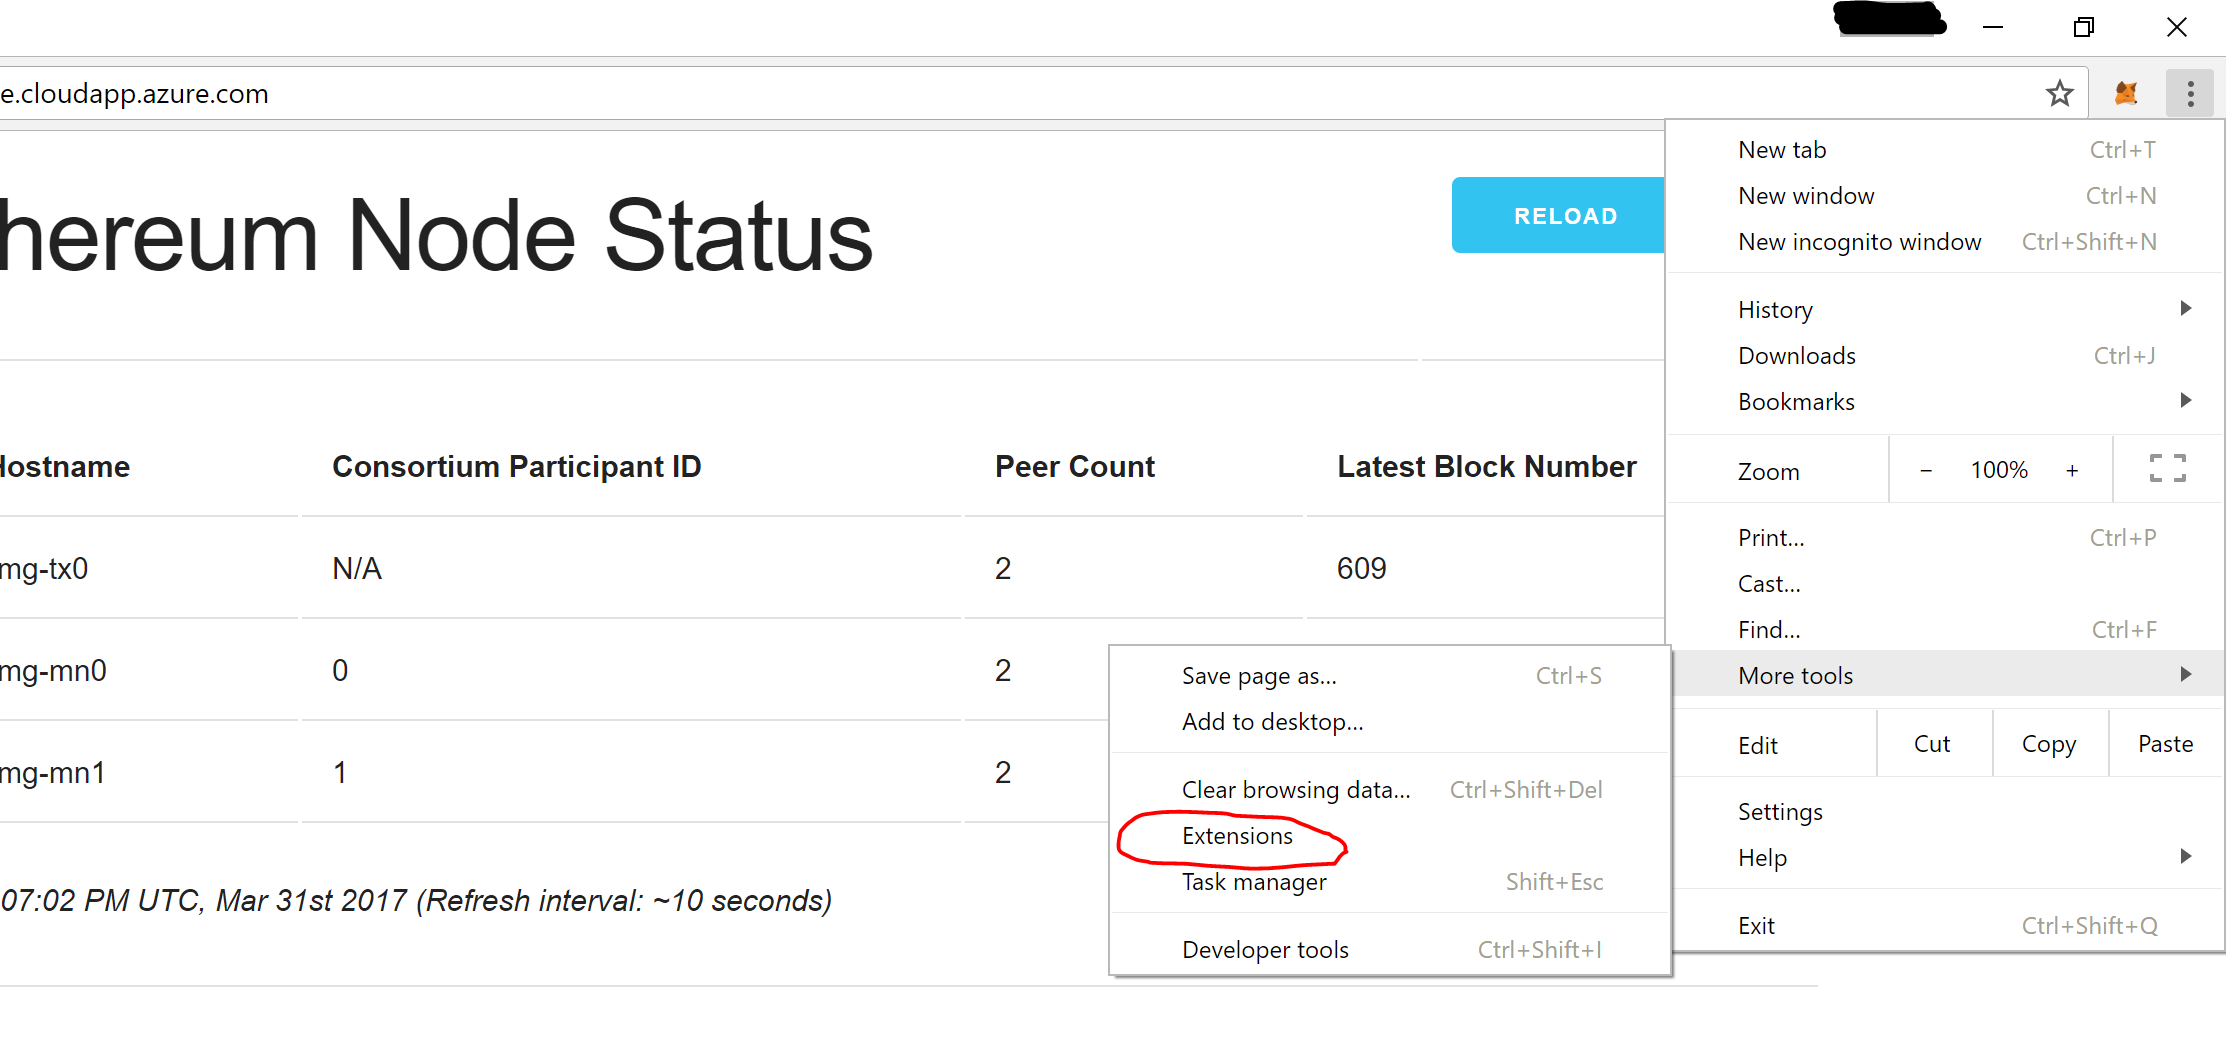
go to Customize and control Google Chrome (Overflow button)
then select More Tools; Extensions
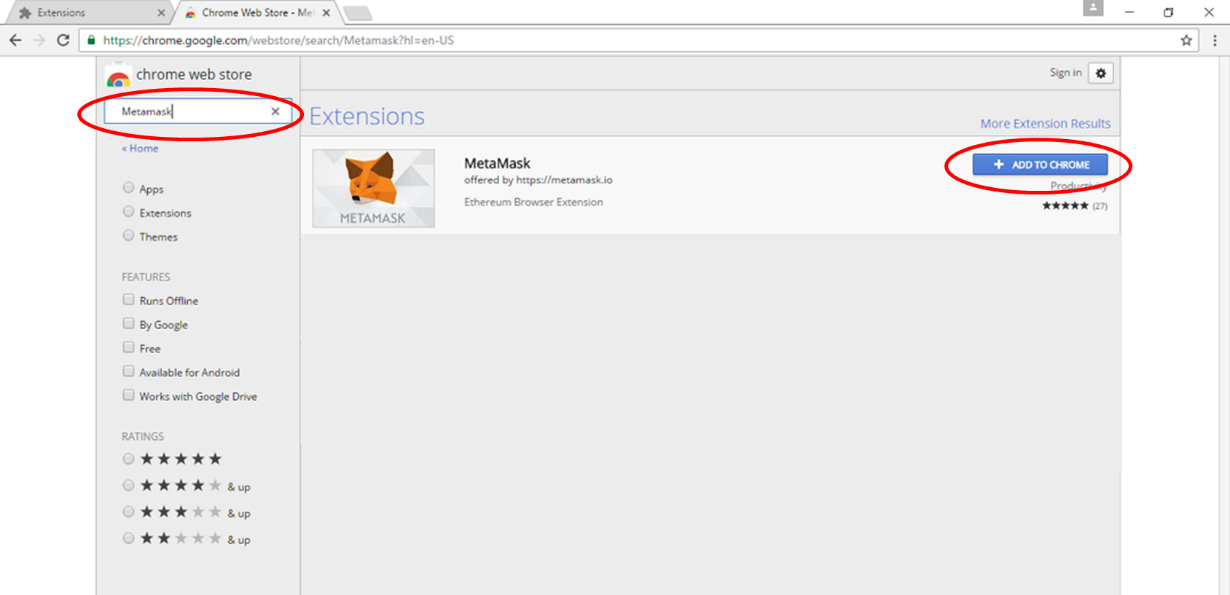
Select [Get More Extensions] and search for MetaMask.
Select[ADD TO CHROME] to install the extension
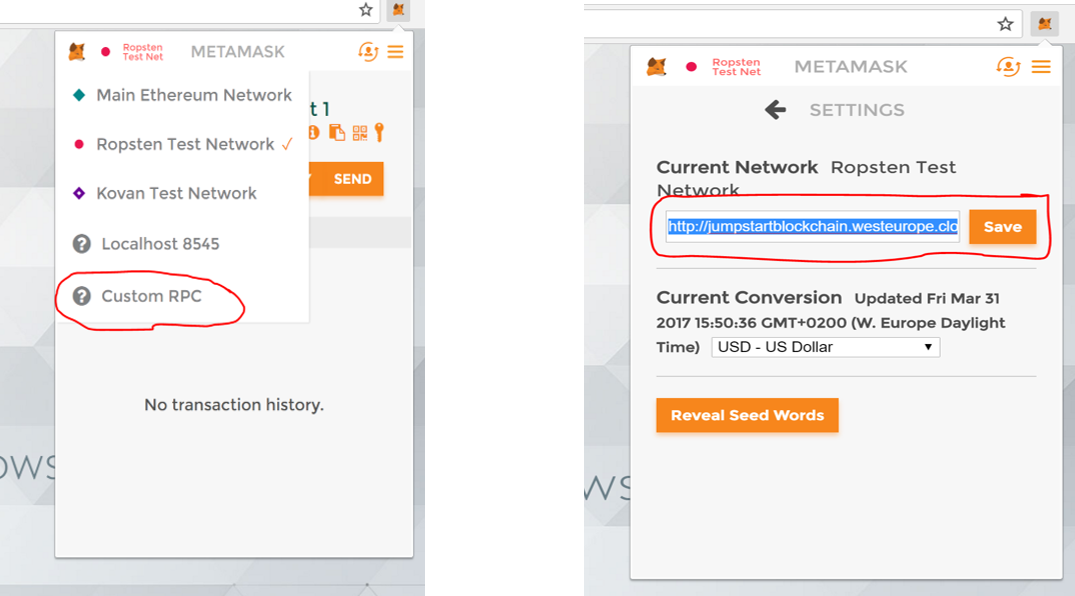
Once installed, open MetaMask to create a new vault. By default, the vault will be connected to the Ropsten Test Network with a new Account. You will need to change this to connect to the deployed private consortium network, specifically to the load balancer in front of the transaction nodes that has an RPC endpoint at port 8545. The address is http://jumpstartblockchain.westeurope.cloudapp.azure.com:8545
Select Custom RPC in the Network list and
enter the network address of the Consortium Network and
click [Save].
Open MetaMask again, you will have to login again to your vault. Now you are connected to the Consortium network so you can create an account on this network.
Create your Ethereum Account
Select Switch Accounts and then the [+] button as shown below
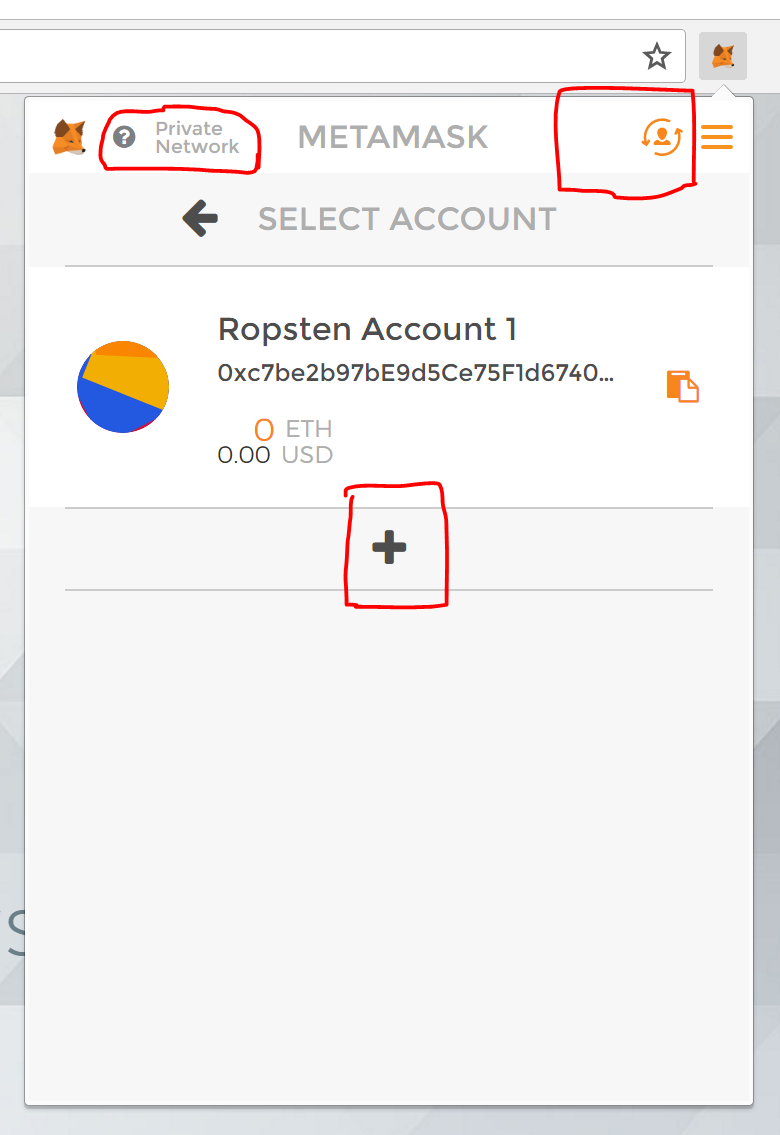
You now have created a new Account, if you want you can change the name of your Account by selecting [edit] above the account name.
Transfer Ether to your Account
Through the administrator page, you can formulate a transaction to transfer Ether from the pre-allocated account on the Consortium network to another Ethereum account. This Ether transfer is a transaction that is sent to the transaction node and mined into a block as illustrated below.
![]()
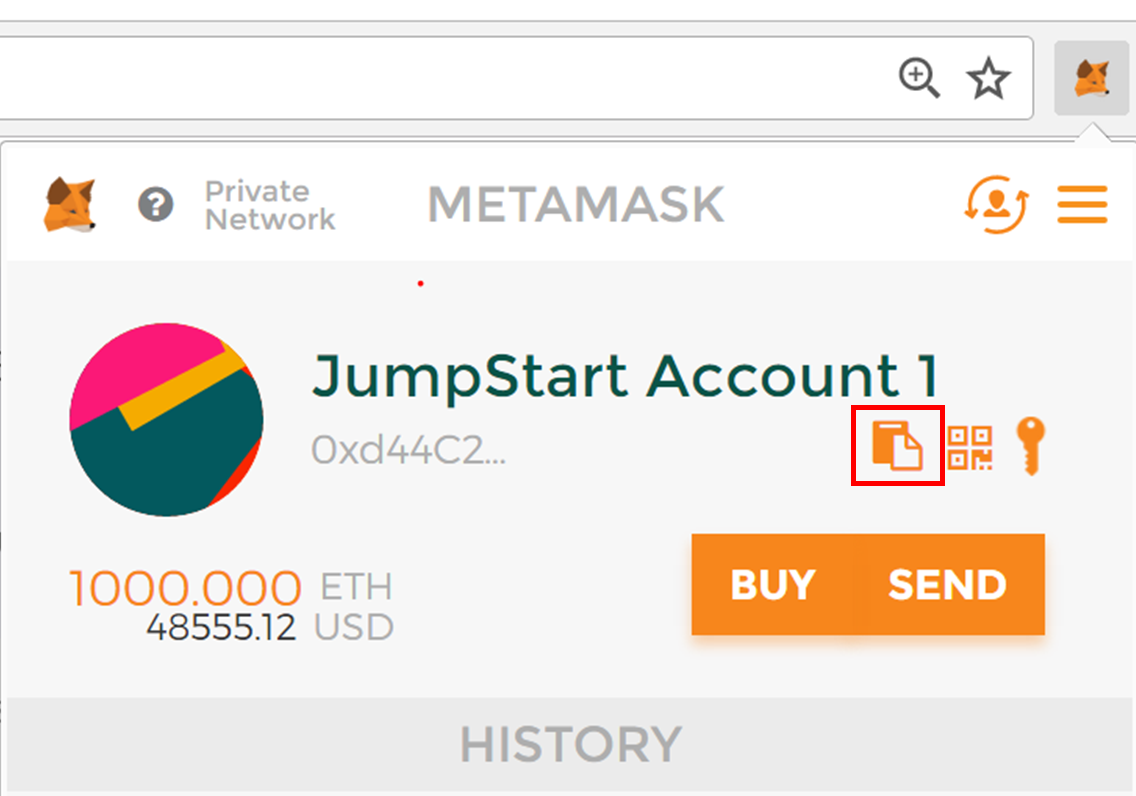
Via the clipboard icon in the MetaMask wallet, copy the address of the Ethereum account
Navigate to the network Admin page and paste the copied account into the input field and click [submit]
![]()
Wait for the transaction to be mined into a block to have 1000 ether transferred from the pre-allocated Ethereum account to your newly created account. Once the transaction is committed into a mined block, the account balance in MetaMask for your account will reflect the transfer of 1000 Ether.

Create a second account in MetaMask and also transfer 1000 Ether to this second account. To experiment with Smart Contracts you need at least 2 different Accounts.